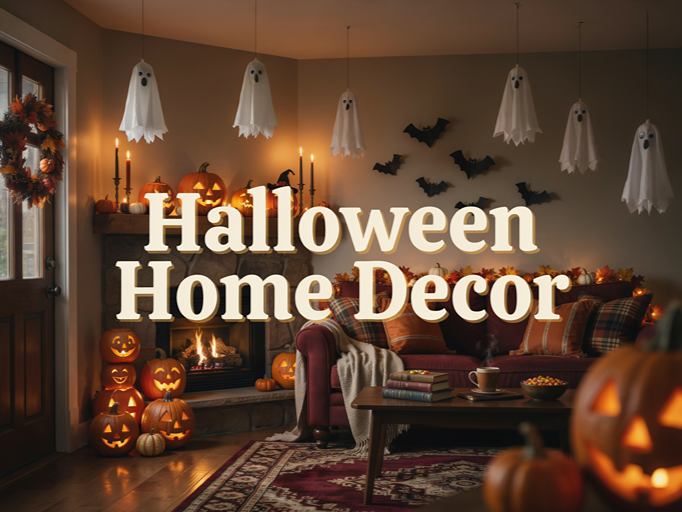
Halloween decorating is one of those things that can get out of hand fast. One minute you’re adding a tiny pumpkin to the porch, and the next you’re wondering whether your living room needs a full-size ghost hanging from the ceiling.
The good news? You don’t need an enormous decorating budget to make your home feel ready for Halloween.
With a few basic craft supplies, recycled containers, paper, fabric, paint, and a little imagination, you can create decorations that look surprisingly impressive without spending a fortune.
These DIY Halloween crafts include everything from creepy porch decorations and glowing lanterns to cute ghosts, bats, pumpkins, witches, and spooky table decor.
Most of them are beginner-friendly, too.
So clear off your craft table, heat up the glue gun, and get ready to turn ordinary supplies into Halloween decorations you’ll actually want to show off.
Halloween Craft Supplies Worth Having Around
You definitely don’t need every craft supply in the store. A small collection of basics will cover most of the Halloween projects on this list.
Keep these handy:
- Hot glue gun and glue sticks
- Black, white, orange, purple, and green craft paint
- Cardstock and construction paper
- Black felt
- Cheesecloth or inexpensive white fabric
- Twine and ribbon
- Googly eyes
- Battery-operated LED lights
- Mason jars and recycled containers
- Foam balls
- Cardboard
- Scissors
- Craft knife
- Paintbrushes
- Floral wire
- Fake spiders and miniature skeleton pieces
Once those supplies are ready, the spooky transformation can begin.
1. Haunted Village Lanterns
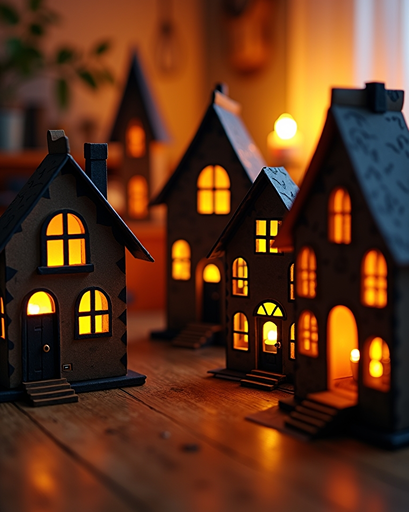
A tiny glowing haunted village can instantly turn a dark shelf or windowsill into a Halloween scene.
Best for: Mantels, shelves, and windows
Time to make: 40 minutes
Difficulty: Easy
What You’ll Need
- Small cardboard boxes
- Black paint
- Yellow or orange tissue paper
- Craft knife
- Battery-operated tea lights
- Hot glue
How to Make It
- Cut small windows and crooked doors into the cardboard boxes.
- Paint every box black.
- Glue yellow tissue paper behind the window openings.
- Arrange the boxes together like a tiny village.
- Place battery-powered lights inside.
When the lights come on, the windows will glow like a miniature haunted town.
Pro Tip: Make the roofs slightly uneven instead of perfectly straight. Crooked buildings immediately make the village feel older and creepier.
2. Paper Bag Monster Luminaries
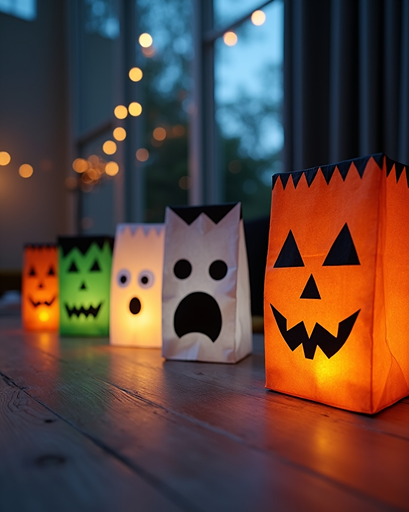
Ordinary paper bags become adorable little Halloween monsters with just paint and a few funny faces.
Best for: Walkways and porches
Time to make: 20 minutes
Difficulty: Very easy
What You’ll Need
- White or brown paper bags
- Craft paint
- Black marker
- Googly eyes
- LED tea lights
How to Make It
- Paint each bag as a different Halloween character.
- Try pumpkins, ghosts, Frankenstein monsters, or silly vampires.
- Add eyes and facial details.
- Place an LED light inside each bag.
- Line them along your walkway.
Pro Tip: Make every face different. A group of slightly mismatched monsters looks far more playful than identical ones.
3. Floating Cheesecloth Ghosts
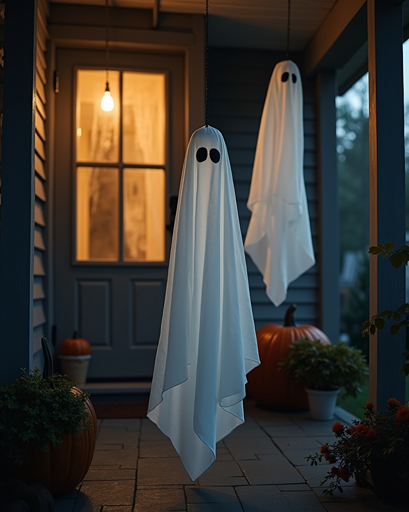
These lightweight ghosts look surprisingly convincing when they move in the breeze.
Best for: Porches and covered outdoor areas
Time to make: 30 minutes
Difficulty: Easy
What You’ll Need
- Cheesecloth
- Foam balls
- Floral wire
- Fabric stiffener
- Black felt
- Fishing line
How to Make It
- Shape floral wire into simple ghost arms.
- Place a foam ball on top for the head.
- Drape cheesecloth over the structure.
- Apply fabric stiffener and allow it to dry.
- Remove the temporary support.
- Add small black felt eyes.
- Hang the ghost with clear fishing line.
Pro Tip: Hang several ghosts at different heights to create the illusion that they’re floating toward your guests.
4. Pumpkin Potion Bottles
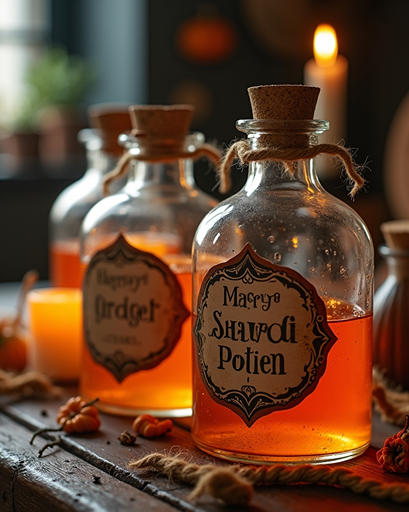
Turn empty bottles into mysterious potions that look like they came straight from a witch’s cupboard.
Best for: Kitchen counters and Halloween party tables
Time to make: 25 minutes
Difficulty: Easy
What You’ll Need
- Empty glass bottles
- Orange paint
- Twine
- Paper labels
- Black marker
- Corks
How to Make It
- Paint the bottles in different shades of orange and brown.
- Create labels with names like “Pumpkin Venom,” “Moon Dust,” or “Witch’s Tonic.”
- Age the paper by gently crumpling the edges.
- Tie twine around each bottle neck.
- Finish with cork tops.
Pro Tip: Dab brown paint around the bottle edges with a sponge to create an old apothecary look.
5. Spooky Bat Branch Centerpiece
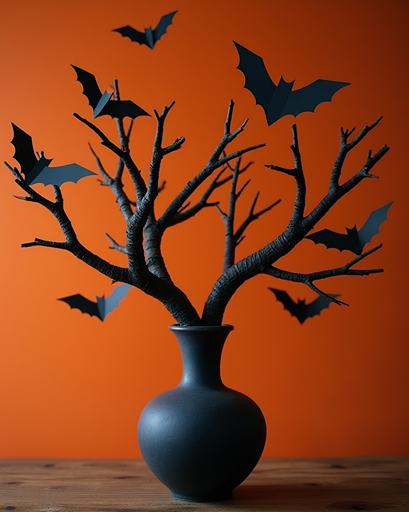
This Halloween centerpiece is dramatic without needing complicated supplies.
Best for: Dining tables and entryway tables
Time to make: 25 minutes
Difficulty: Easy
What You’ll Need
- Bare tree branches
- Black spray paint
- Black cardstock
- Scissors
- Hot glue
- Tall vase
How to Make It
- Paint several dry branches black.
- Cut tiny bats from cardstock.
- Fold each bat slightly through the center.
- Glue the bats onto different branches.
- Arrange everything inside a tall vase.
Pro Tip: Point the bats in different directions so it looks like an entire swarm is taking flight.
6. Creepy Spell Book Stack

Give ordinary old books a haunted-library makeover.
Best for: Mantels, shelves, and side tables
Time to make: 45 minutes
Difficulty: Medium
What You’ll Need
- Old hardcover books
- Black and brown paint
- Hot glue
- Cardboard letters
- Metallic craft paint
How to Make It
- Paint the book covers dark brown or black.
- Glue raised letters onto the covers.
- Add titles like “Ancient Curses” or “Book of Shadows.”
- Dry-brush metallic paint over the raised details.
- Stack the books unevenly.
Pro Tip: Glue a fake spider or tiny skeleton hand between two books for an unexpected creepy detail.
7. Ghost Tassel Garland
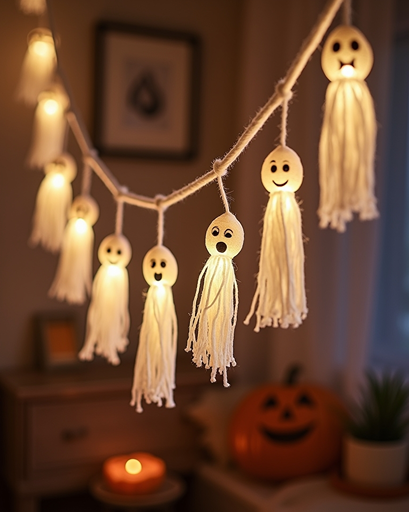
This cute Halloween garland takes very little time and works almost anywhere.
Best for: Mantels, kids’ rooms, and party tables
Time to make: 20 minutes
Difficulty: Very easy
What You’ll Need
- White yarn
- Black felt
- String
- Scissors
- Hot glue
How to Make It
- Wrap white yarn several times around your hand.
- Tie one end together.
- Cut the opposite end to create a tassel.
- Add tiny black felt eyes.
- Attach each ghost to a long piece of string.
Pro Tip: Mix different-sized ghosts instead of making them perfectly identical.
8. Monster Door Wreath
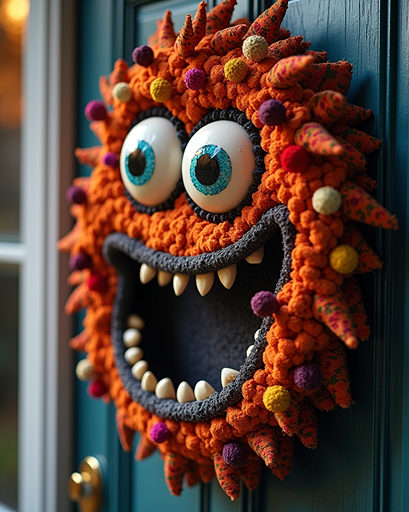
Give guests a hilarious Halloween welcome before they even knock.
Best for: Front doors
Time to make: 35 minutes
Difficulty: Easy
What You’ll Need
- Foam wreath form
- Green or purple fabric
- Large googly eyes
- White craft foam
- Hot glue
How to Make It
- Wrap the wreath form completely in fabric.
- Add two oversized googly eyes.
- Cut sharp teeth from white craft foam.
- Glue the teeth around the lower half.
- Add eyebrows or small horns if you want extra personality.
Pro Tip: Slightly crooked teeth make the monster much more fun.
9. Skeleton Hand Flower Pot
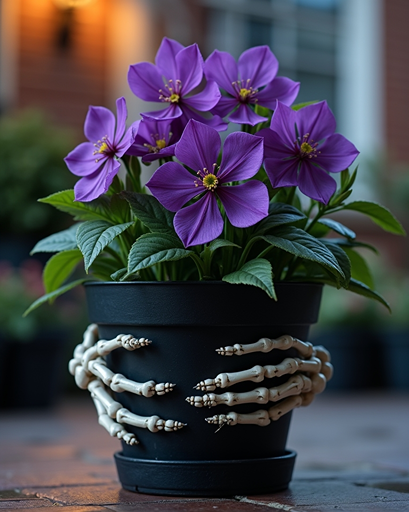
Halloween doesn’t mean you have to give up flowers.
Best for: Porch tables and entryways
Time to make: 20 minutes
Difficulty: Easy
What You’ll Need
- Black flower pot
- Artificial dark flowers
- Plastic skeleton hands
- Floral foam
- Fake moss
How to Make It
- Place floral foam inside the pot.
- Arrange dark red, purple, or black flowers.
- Insert skeleton hands between the flowers.
- Cover the exposed foam with moss.
Pro Tip: Position one skeleton hand so it appears to be reaching out of the arrangement.
10. Bloody Handprint Window Decorations
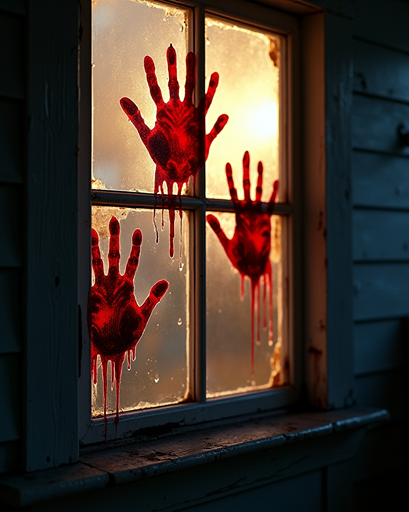
This simple Halloween project creates a creepy effect with almost no effort.
Best for: Windows and mirrors
Time to make: 15 minutes
Difficulty: Very easy
What You’ll Need
- Washable red window paint
- Disposable gloves
- Sponge
- Paper towels
How to Make It
- Apply a thin layer of washable paint to your gloved palm.
- Press your hand lightly against the glass.
- Drag a few fingers downward to create streaks.
- Add smaller smears around the main print.
Pro Tip: Test your paint on a small area first and make sure it is designed to wash safely from glass.
11. Black Cat Paper Lanterns
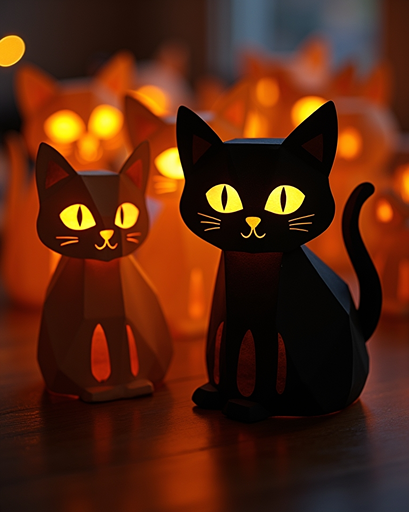
These glowing cats are spooky enough for Halloween but cute enough for family-friendly decorating.
Best for: Tables, shelves, and windows
Time to make: 20 minutes
Difficulty: Easy
What You’ll Need
- Black cardstock
- Paper lanterns or jars
- Yellow paper
- Scissors
- Glue
- LED lights
How to Make It
- Cover the lantern or jar with black paper.
- Cut triangular ears from cardstock.
- Add glowing yellow eyes.
- Place an LED light inside.
- Arrange several cats together.
Pro Tip: Give every cat a slightly different eye shape so they appear to have their own personalities.
12. Witch Broom Parking Sign
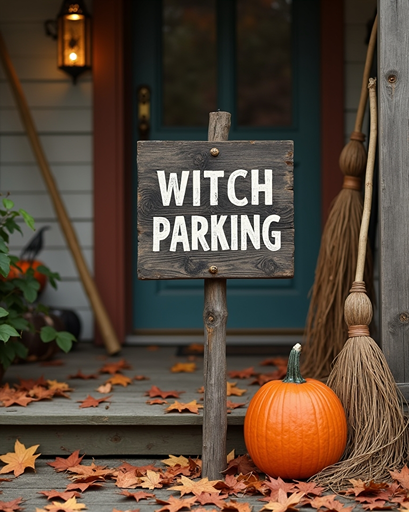
Apparently witches need somewhere to park too.
Best for: Porches and Halloween parties
Time to make: 30 minutes
Difficulty: Easy
What You’ll Need
- Wooden board
- Black and orange paint
- Paintbrush
- Wooden stake
- Several decorative brooms
How to Make It
- Paint the board with a dark base color.
- Add the words “Witch Parking.”
- Attach it to a wooden stake.
- Place several decorative brooms beside it.
Pro Tip: Add “Violators Will Be Toad” underneath for a funny finishing touch.
13. Candy Corn Yarn Trees
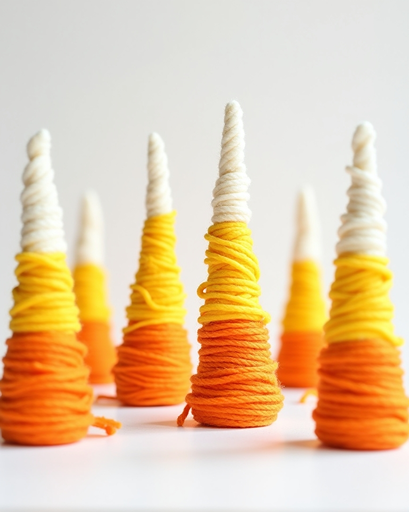
Not every Halloween decoration needs to be terrifying.
Best for: Shelves and tabletop displays
Time to make: 30 minutes
Difficulty: Easy
What You’ll Need
- Cardboard cones
- White yarn
- Orange yarn
- Yellow yarn
- Hot glue
How to Make It
- Begin wrapping yellow yarn around the bottom of the cone.
- Switch to orange through the middle.
- Finish with white at the top.
- Secure the yarn ends with glue.
Pro Tip: Create three or five trees in different heights for a much more polished display.
14. Spiderweb Embroidery Hoop
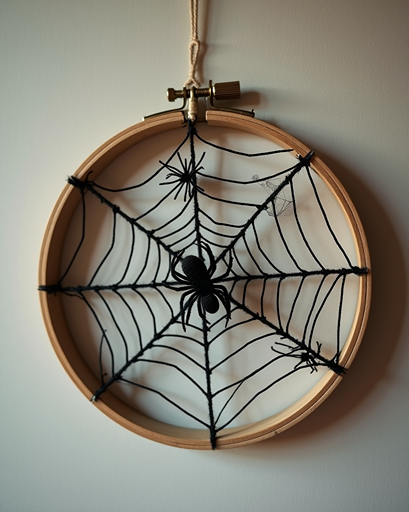
This is one of the easiest ways to create clean-looking Halloween wall decor.
Best for: Walls and doors
Time to make: 25 minutes
Difficulty: Easy
What You’ll Need
- Embroidery hoop
- Black yarn
- Plastic spiders
- Hot glue
How to Make It
- Stretch yarn across the hoop in several directions.
- Weave additional yarn around the center.
- Continue until a loose spiderweb appears.
- Glue plastic spiders onto the web.
Pro Tip: Don’t make the web perfectly symmetrical. Real webs are messy, and your Halloween version should be too.
15. Creepy Eyeball Bouquet

Flowers staring back at you? Perfectly normal Halloween behavior.
Best for: Party tables and entryways
Time to make: 25 minutes
Difficulty: Easy
What You’ll Need
- Artificial flowers
- Plastic eyeballs
- Floral wire
- Black vase
- Hot glue
How to Make It
- Remove the center of several artificial flowers.
- Glue an eyeball into each opening.
- Arrange them inside a dark vase.
- Add a few bare branches between the flowers.
Pro Tip: Mix different eyeball sizes to make the bouquet more unsettling.
16. Rustic Pumpkin Crate Display
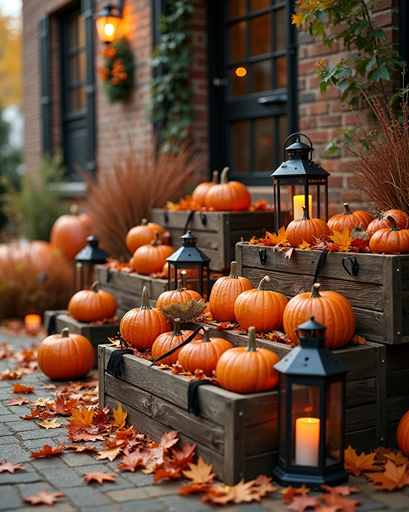
Wooden crates can create a big porch display without requiring complicated crafting.
Best for: Front porches
Time to make: 30 minutes
Difficulty: Easy
What You’ll Need
- Wooden crates
- Mini pumpkins
- Faux leaves
- Lanterns
- Black ribbon
How to Make It
- Stack the crates at different angles.
- Fill them with pumpkins and autumn leaves.
- Add lanterns between the crates.
- Tie black ribbon around a few pumpkins.
Pro Tip: Leave some empty space. Overfilling the display can make the individual pieces disappear.
17. Hanging Bat Mobile
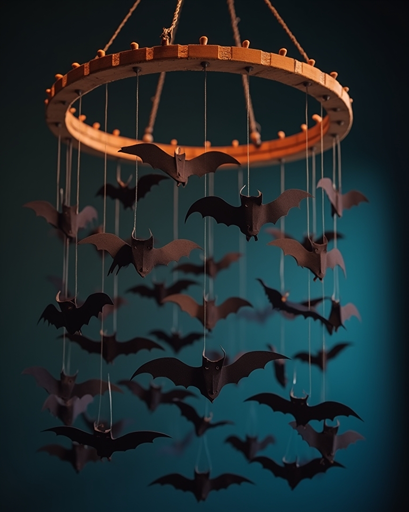
A swarm of bats overhead immediately changes the mood of a room.
Best for: Party rooms and hallways
Time to make: 30 minutes
Difficulty: Easy
What You’ll Need
- Black cardstock
- Fishing line
- Wooden hoop
- Scissors
How to Make It
- Cut bats in several different sizes.
- Bend the wings slightly.
- Attach each bat to fishing line.
- Tie the lines around a wooden hoop.
- Hang the mobile from the ceiling.
Pro Tip: Use different line lengths so the bats appear to be flying rather than hanging in a flat circle.
18. Haunted Mirror Frame
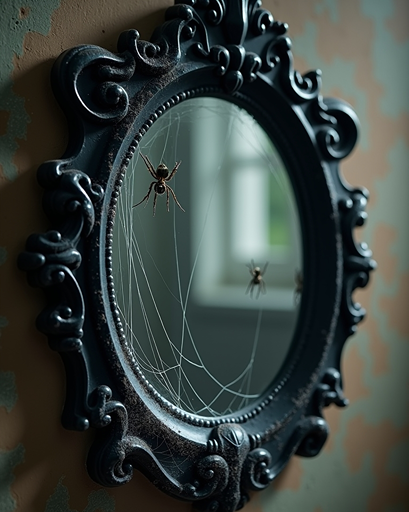
A regular mirror can become one of the creepiest decorations in your house.
Best for: Hallways and bathrooms
Time to make: 35 minutes
Difficulty: Medium
What You’ll Need
- Inexpensive mirror
- Black paint
- Fake cobweb
- Plastic spiders
- Decorative trim
How to Make It
- Paint the frame matte black.
- Add decorative trim around the edges.
- Stretch small amounts of cobweb across the corners.
- Add a few tiny spiders.
Pro Tip: Use cobweb sparingly. A little looks abandoned and eerie; too much starts looking like cotton.
19. Witch’s Potion Shelf
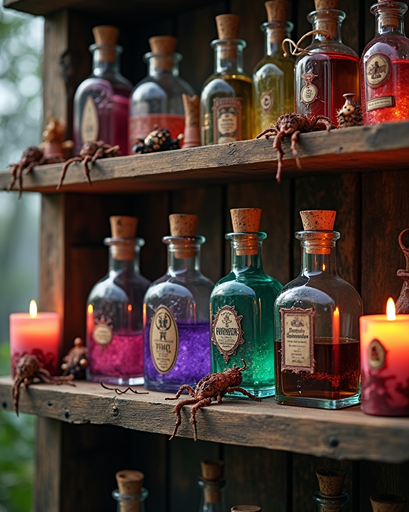
Transform an ordinary shelf into a miniature witch laboratory.
Best for: Kitchens and Halloween parties
Time to make: 45 minutes
Difficulty: Easy
What You’ll Need
- Small bottles
- Colored water
- Paper labels
- Twine
- Plastic insects
- Battery candles
How to Make It
- Fill bottles with differently colored water.
- Add spooky potion labels.
- Tie twine around the necks.
- Arrange insects and candles around the bottles.
Pro Tip: Place the tallest bottles toward the back and tiny jars in front to make the display feel deeper.
20. Mummy Jar Lanterns
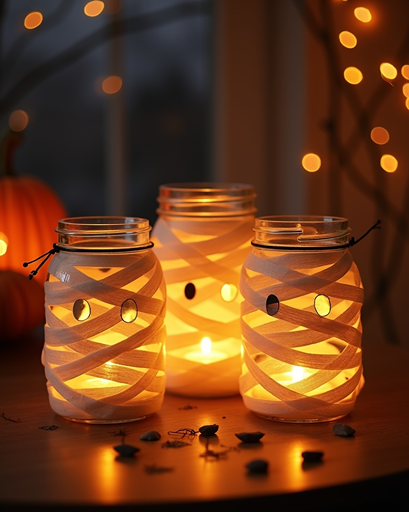
A few wrapped jars can become glowing little mummies in minutes.
Best for: Tables and window ledges
Time to make: 15 minutes
Difficulty: Very easy
What You’ll Need
- Empty jars
- Gauze
- Googly eyes
- Glue
- LED tea lights
How to Make It
- Wrap each jar loosely with gauze.
- Leave a small opening near the top.
- Glue two eyes into the opening.
- Add an LED candle inside.
Pro Tip: Avoid wrapping the gauze too neatly. Loose overlapping strips make the mummy look much better.
21. Pumpkin Spider
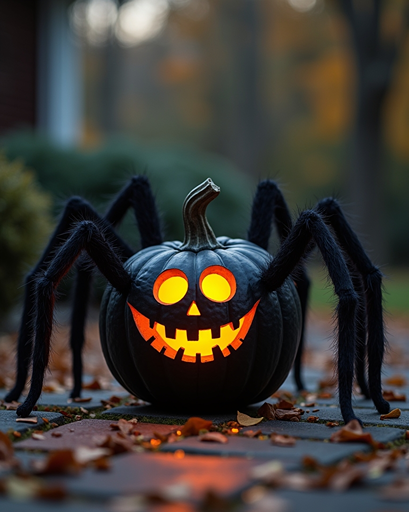
Can’t choose between pumpkins and spiders? Use both.
Best for: Porch steps and yard displays
Time to make: 25 minutes
Difficulty: Easy
What You’ll Need
- Large faux pumpkin
- Black paint
- Flexible black tubing
- Large googly eyes
- Hot glue
How to Make It
- Paint the pumpkin black.
- Cut eight pieces of tubing for legs.
- Bend them into spider-leg shapes.
- Attach them around the pumpkin.
- Add oversized eyes.
Pro Tip: Make the front legs slightly taller to give your spider a dramatic stance.
22. Ghostly Vintage Photo Frames
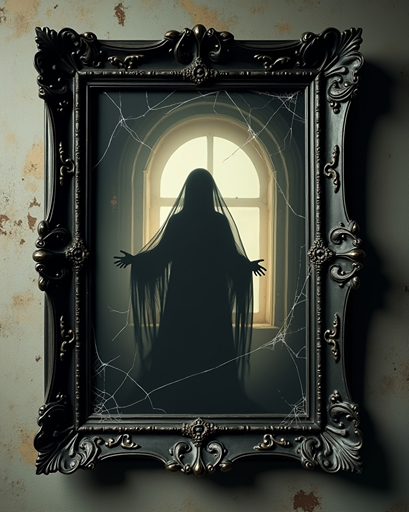
Turn ordinary family-style portraits into haunted-house decorations.
Best for: Gallery walls and shelves
Time to make: 30 minutes
Difficulty: Easy
What You’ll Need
- Thrift-store frames
- Printable vintage-style silhouettes
- Black paint
- Cheesecloth
- Fake cobweb
How to Make It
- Paint mismatched frames black.
- Insert spooky silhouette artwork.
- Add tiny strips of cheesecloth or cobweb around the corners.
- Hang several frames together.
Pro Tip: Mismatched frame shapes make the display feel like it has been hanging in an old mansion for decades.
23. Jack-O’-Lantern Tin Lights
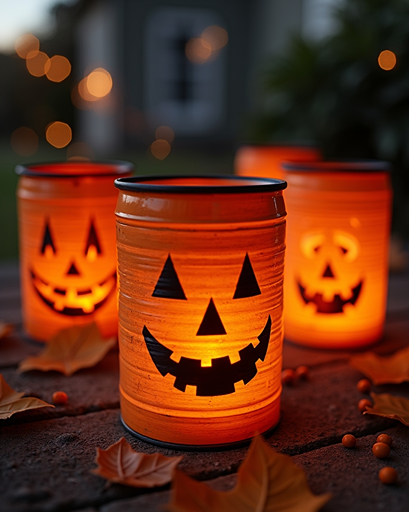
Give empty food cans one more job before recycling them.
Best for: Outdoor tables and porches
Time to make: 35 minutes
Difficulty: Medium
What You’ll Need
- Clean empty cans
- Orange paint
- Nail and hammer
- LED tea lights
How to Make It
- Carefully punch small holes into the can to create a pumpkin face.
- Paint the outside orange.
- Allow it to dry completely.
- Place an LED light inside.
Pro Tip: Freeze water inside the can before punching holes to help prevent the metal from bending.
24. Mini Witch Hat Centerpieces
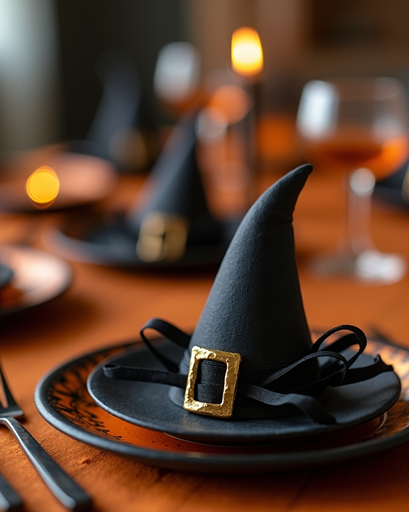
Tiny witch hats are an easy way to decorate a Halloween dinner table.
Best for: Dinner parties and dessert tables
Time to make: 25 minutes
Difficulty: Easy
What You’ll Need
- Black cardstock
- Ribbon
- Small decorative buckles
- Glue
- Scissors
How to Make It
- Roll cardstock into a cone.
- Cut a circular brim.
- Glue the cone onto the brim.
- Wrap ribbon around the base.
- Add a buckle or tiny flower.
Pro Tip: Make each hat slightly different and use them as place settings for guests.
25. Dripping Black Candle Holders
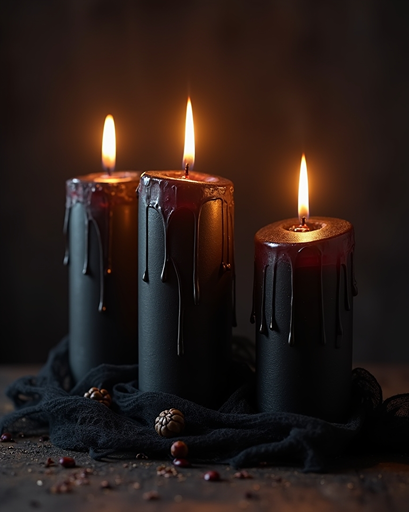
These candle holders look dramatic at night without requiring real dripping wax.
Best for: Mantels and dining tables
Time to make: 30 minutes
Difficulty: Easy
What You’ll Need
- Old candle holders
- Black paint
- Hot glue
- LED candles
How to Make It
- Create thick glue drips down the candle holders.
- Allow the glue to cool completely.
- Paint everything matte black.
- Add LED candles.
Pro Tip: Build several layers of glue drips instead of trying to create everything in one pass.
26. Haunted House Shadow Lantern
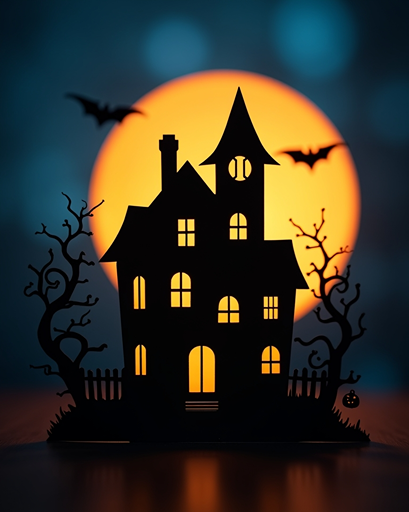
This one looks especially impressive after the lights go down.
Best for: Windows and tables
Time to make: 40 minutes
Difficulty: Medium
What You’ll Need
- Black cardstock
- Tracing paper
- Craft knife
- Cardboard box
- LED light
How to Make It
- Cut a haunted-house silhouette from cardstock.
- Attach tracing paper behind the windows.
- Build a shallow cardboard box behind the design.
- Place an LED light inside.
Pro Tip: Add tiny bats, crooked trees, and a moon silhouette to make the scene feel complete.
27. Giant Yarn Spiderweb
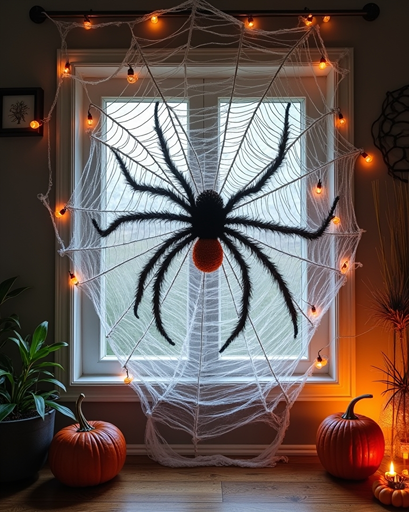
An empty wall can become a huge Halloween feature in less than an hour.
Best for: Party walls and porches
Time to make: 30 minutes
Difficulty: Easy
What You’ll Need
- Thick white yarn
- Removable hooks
- Plastic spiders
How to Make It
- Run several long pieces of yarn outward from a center point.
- Connect those lines with curved pieces.
- Continue until the entire web is formed.
- Add spiders in different locations.
Pro Tip: Allow one spider to hang from a separate strand below the web for extra drama.
28. Skeleton Table Runner
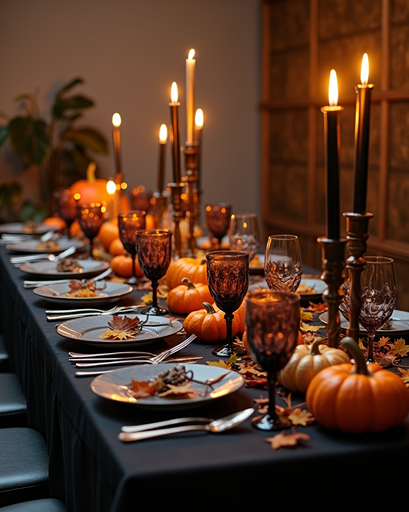
Create an unusual Halloween centerpiece using inexpensive plastic bones.
Best for: Dinner tables
Time to make: 20 minutes
Difficulty: Easy
What You’ll Need
- Black table runner
- Plastic skeleton bones
- Mini pumpkins
- LED candles
- Artificial leaves
How to Make It
- Lay the black runner across the table.
- Scatter skeleton bones down the center.
- Add pumpkins and leaves between them.
- Finish with LED candles.
Pro Tip: Keep decorations fairly low so guests can still see each other across the table.
29. Pumpkin Balloon Wall

Need a large Halloween party decoration without buying dozens of pumpkins? Balloons can do the job.
Best for: Halloween parties and photo areas
Time to make: 45 minutes
Difficulty: Easy
What You’ll Need
- Orange balloons
- Green cardstock
- Black marker
- Balloon tape
How to Make It
- Inflate balloons in several sizes.
- Draw different jack-o’-lantern faces.
- Add small green paper stems.
- Attach balloons together using balloon tape.
- Build the arrangement around a wall or doorway.
Pro Tip: Mix plain orange balloons between the pumpkin faces so the wall doesn’t look too busy.
30. Mini Graveyard Yard Signs

Create your own playful cemetery without digging up the lawn.
Best for: Front yards
Time to make: 1 hour
Difficulty: Medium
What You’ll Need
- Foam board
- Gray paint
- Wooden stakes
- Black paint
- Craft knife
How to Make It
- Cut foam board into tombstone shapes.
- Paint them in different shades of gray.
- Add cracks and funny epitaphs.
- Attach a wooden stake to the back.
- Place the signs throughout the yard.
Pro Tip: Angle a few tombstones slightly instead of placing every one perfectly upright.
31. Floating Witch Hats
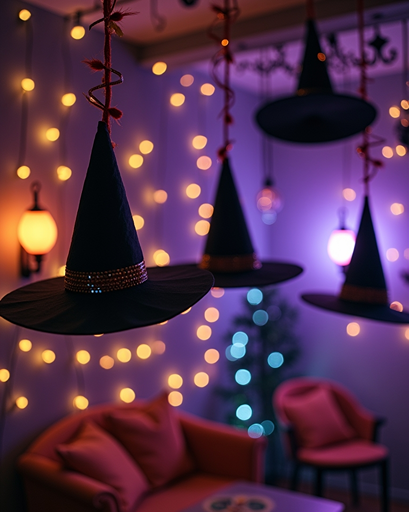
Seeing glowing witch hats floating overhead will definitely make guests look twice.
Best for: Covered porches and party rooms
Time to make: 25 minutes
Difficulty: Easy
What You’ll Need
- Lightweight witch hats
- Fishing line
- Battery fairy lights
- Removable ceiling hooks
How to Make It
- Place a small string of lights inside each hat.
- Thread fishing line through the top.
- Hang the hats from the ceiling.
- Adjust the heights until the arrangement feels balanced.
Pro Tip: Keep some hats low and others much higher to make them look like they’re actually floating through the room.
32. Ghost Lollipop Bouquet
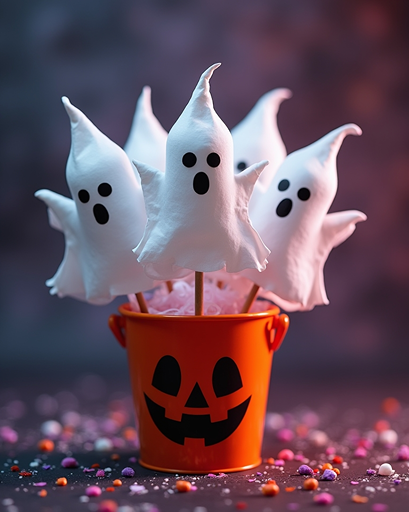
This craft doubles as a decoration and a treat for guests.
Best for: Kids’ parties and candy tables
Time to make: 15 minutes
Difficulty: Very easy
What You’ll Need
- Round lollipops
- White tissue paper
- Black marker
- Ribbon
- Small bucket
How to Make It
- Cover each lollipop with a square of tissue paper.
- Tie ribbon beneath the candy.
- Draw two tiny ghost eyes.
- Arrange the finished ghosts inside a bucket.
Pro Tip: Fill the bucket with black shredded paper so the ghosts stand upright.
33. Pumpkin Patch Garland
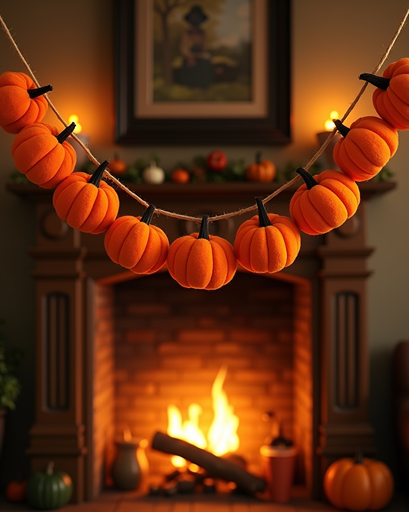
This simple garland brings a warm Halloween look to shelves, fireplaces, or windows.
Best for: Mantels and windows
Time to make: 25 minutes
Difficulty: Easy
What You’ll Need
- Orange felt
- Green felt
- String
- Cotton stuffing
- Hot glue
How to Make It
- Cut pairs of pumpkin shapes from orange felt.
- Glue the edges together.
- Leave a small opening.
- Add a little stuffing.
- Close the opening.
- Add green stems.
- Attach the pumpkins to string.
Pro Tip: Use two or three shades of orange felt to keep the garland from looking flat.
34. Skeleton Hand Door Wreath
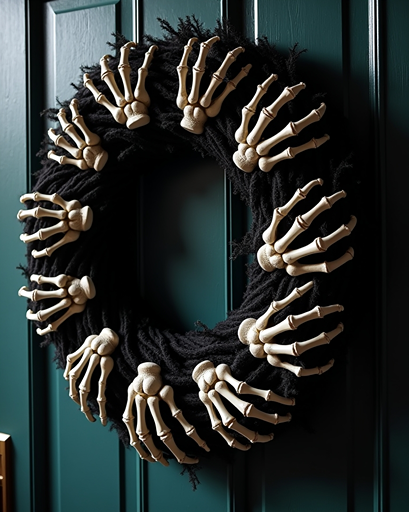
A circle of bony hands makes a surprisingly stylish Halloween wreath.
Best for: Front doors
Time to make: 35 minutes
Difficulty: Easy
What You’ll Need
- Plastic skeleton hands
- Foam wreath ring
- Black ribbon
- Hot glue
- Small decorative skull
How to Make It
- Paint the wreath ring black if necessary.
- Arrange skeleton hands around the circle.
- Glue each hand securely.
- Add a skull or bow near the bottom.
- Hang with black ribbon.
Pro Tip: Point a few fingers outward instead of keeping every hand in the same position.
35. Glow-in-the-Dark Ghost Path Markers
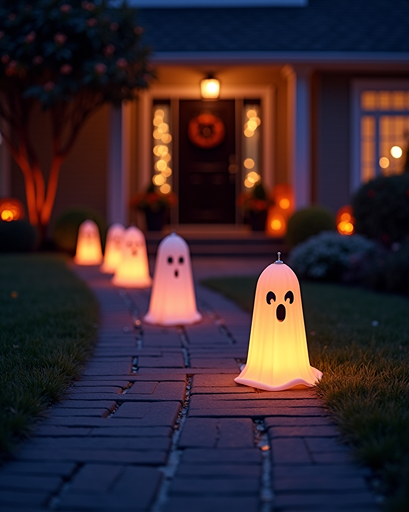
Finish your Halloween setup with tiny glowing ghosts guiding visitors toward your door.
Best for: Walkways and gardens
Time to make: 30 minutes
Difficulty: Easy
What You’ll Need
- Small white containers or lightweight plastic balls
- Glow-in-the-dark paint
- Black marker
- Wooden garden stakes
- Hot glue
How to Make It
- Paint each container or ball with glow-in-the-dark paint.
- Allow it to dry thoroughly.
- Draw simple ghost faces with black marker.
- Attach each ghost to a garden stake.
- Place them along the walkway.
Pro Tip: Charge the glow paint under bright light before sunset so the ghosts shine much more strongly once it gets dark.
Ready to Turn Your Home Into Halloween Headquarters?
The best Halloween decorations aren’t always the ones that cost the most.
Sometimes a cardboard box, a handful of yarn, an empty jar, or a few pieces of black paper can turn into something that completely changes the atmosphere of a room.
Start with two or three projects you genuinely like instead of trying to make everything at once. Create one larger statement decoration for your porch or entryway, then add smaller handmade details around it.
And don’t worry about making every ghost, pumpkin, bat, or spider look perfect.
Halloween is probably the one holiday where crooked, messy, strange, and slightly creepy can actually make your decorations better.
Grab your supplies, pick your favorite idea, and start crafting.
Your haunted house is officially under construction.